
A code-compliant ramp is not an obstacle; it is a precisely engineered safety system where every measurement prevents a specific, quantifiable danger.
- Slope ratio is the primary determinant of user effort and rollback risk; the 1:12 standard is a maximum, not a target.
- Landing size is non-negotiable, ensuring sufficient space for safe maneuvering at doorways and changes in direction.
- Material choice directly impacts winter safety, long-term maintenance costs, and overall structural integrity.
Recommendation: Audit your entryway’s entire path of travel, including door width and swing, *before* purchasing or building any ramp components to prevent catastrophic and costly structural errors.
The immediate need for wheelchair accessibility can create immense pressure on a family. In this urgency, the primary goal often becomes simply to bridge the gap between the ground and the doorway. However, treating a ramp as a mere incline is a critical mistake. The reality is that an improperly installed ramp introduces more hazards than it solves, from dangerous rollback incidents to falls that can have severe consequences for both the user and caregiver. While basic advice often centers on a simple slope ratio, true safety lies in understanding the regulatory framework that governs ramp construction. These codes are not arbitrary; they are the result of extensive ergonomic and safety analysis.
This guide moves beyond generic tips to provide a regulatory perspective on entryway ramp installation. We will dissect the compliance mechanics behind each standard, explaining not just *what* the rules are, but *why* they exist. According to research published by the U.S. Department of Education, just over 6.8 million community-resident Americans use assistive devices for mobility, a figure that underscores the vast need for correctly designed environments. Understanding the principles of slope, the function of landings, the properties of materials, and the critical interface with the doorway is essential. This knowledge transforms a construction project into a life-enhancing safety installation.
By adopting the mindset of a compliance officer, you can identify and mitigate failure points before they are built. This article provides the necessary framework to evaluate materials, plan for holistic user needs, avoid common renovation errors, and ensure the final structure is not only functional but fundamentally safe and compliant.
Summary: Installing Entryway Ramps That Comply With Safety Codes
- How to Create a Holistic Health Plan for Seniors Over 70?
- Aluminum vs. Pressure-Treated Wood: Which Ramp Lasts Longer in Winter?
- How to Landscape Around a Ramp to Hide the “Hospital Look”?
- The Error of Omitting a Flat Landing at the Door Threshold
- When to Rent a Modular Ramp Instead of Building One?
- Choosing Between Manual and Power Wheelchairs for Long-Term Shoulder Health
- Navigating Uneven Community Environments With Limited Mobility
- The Renovation Mistake That Leaves Doorways Too Narrow for Wheelchairs
How to Create a Holistic Health Plan for Seniors Over 70?
From a regulatory standpoint, a wheelchair ramp is a medical device integrated into a home’s structure. Its design directly impacts the user’s health, safety, and quality of life. Therefore, its planning must be part of a holistic assessment, not just a construction task. According to CDC research, about 1 in 4 adults aged 65 and older experience mobility disability, making safe home access a cornerstone of independent living. A properly designed ramp is a critical tool for fall prevention, which is paramount given that falls are a leading cause of injury in this demographic.
The plan must also account for the well-being of caregivers. A ramp with an excessive slope or without adequate width places undue physical strain on anyone assisting the user, increasing the risk of injury for both parties. Furthermore, the psychological impact on the senior cannot be overstated. An accessible home fosters a sense of dignity, independence, and control. When a person can enter and exit their home safely and without assistance, it significantly boosts their mental and emotional health, reinforcing their ability to age in place.
Finally, a holistic plan is forward-thinking. It considers the potential for progressive conditions. A modular ramp system, for example, allows for adjustments as mobility needs change over time. This adaptability ensures that the initial investment continues to serve the user’s health and safety for years to come, making it a sustainable part of their long-term care plan.
Aluminum vs. Pressure-Treated Wood: Which Ramp Lasts Longer in Winter?
The choice of material for a wheelchair ramp is not merely an aesthetic decision; it is a critical safety and financial calculation, especially in regions with harsh winter weather. While pressure-treated wood often has a lower initial material cost, its performance and maintenance requirements over time can make it a less compliant and more expensive option in the long run. Aluminum, by contrast, offers superior durability and lifecycle value.

The primary failure point for wood in winter is its susceptibility to moisture. Freeze-thaw cycles cause wood to expand, contract, warp, and crack, compromising the structural integrity of the ramp. Wet or icy wood also becomes exceptionally slippery, creating a significant fall hazard. To remain safe, a wood ramp requires annual sealing and staining, a recurring cost in both materials and labor. Aluminum, being non-porous, does not absorb water and is not subject to warping. Its factory-applied, textured surfaces are designed to maintain high traction even when wet or frosty. This material resists rust and corrosion from winter conditions and de-icing agents, requiring only occasional cleaning.
A total cost of ownership analysis reveals the long-term financial implications. The initial savings of a wood ramp are often negated within a few years by maintenance costs, and its resale value is zero, as it is a permanent fixture that must be demolished for removal.
| Cost Factor | Aluminum Ramp | Pressure-Treated Wood |
|---|---|---|
| Initial Material Cost (30′ ramp) | $6,400 | $4,600 |
| Installation Labor | $0-500 (DIY possible in 3-5 hours) | $1,440 (2-3 days, 2 carpenters) |
| Annual Maintenance | $0 (occasional cleaning) | $200-400 (staining, sealing) |
| Winter-Specific Costs | Non-corrosive ice melt only | Annual re-sealing, potential warping repairs |
| 10-Year Total | $6,900 | $8,040-$10,040 |
| Resale Value | 40-60% (modular, removable) | 0% (permanent fixture) |
How to Landscape Around a Ramp to Hide the “Hospital Look”?
While code compliance and structural safety are the primary objectives of a ramp installation, aesthetic integration is a valid concern for homeowners. A well-designed ramp should not detract from a property’s curb appeal. Strategic landscaping can soften the utilitarian appearance of a ramp, making it a harmonious part of the home’s exterior.
The key is to use natural elements and hardscaping to frame and complement the ramp’s structure rather than attempting to hide it completely. This approach ensures that safety features like handrails and edge protection remain unobstructed. As the design team at CAPS Remodeling notes, integrating the ramp into the landscape enhances the overall design.
Plant borders line the sides of the ramp with shrubs, flowers, or ornamental grasses. This frames the ramp and adds visual interest while creating a harmonious exterior.
– CAPS Remodeling Design Team, How to Incorporate Wheelchair Ramps Without Compromising Curb Appeal
Effective strategies for aesthetic integration include:
- Plant Borders: Use low-growing shrubs, perennial flowers, or ornamental grasses along the sides of the ramp. This creates a soft, natural border that adds color and texture. For users who enjoy gardening, raised planters at wheelchair height can be incorporated.
- Pathway Lighting: Install low-voltage or solar-powered LED lights along the ramp’s edge. This serves a dual purpose: it enhances safety for nighttime use and creates a warm, inviting ambiance.
- Climbing Plants: If the ramp has suitable railings, a trellis can be added to support non-invasive climbing plants like clematis or morning glories. This creates a “green wall” effect that can be particularly effective on longer ramp sections.
- Matching Hardscaping: Unify the ramp with existing walkways or patios by using matching pavers or creating a stone edge border along the base of the ramp. A low retaining wall can also help integrate the ramp into a sloped yard.
The Error of Omitting a Flat Landing at the Door Threshold
One of the most frequent and dangerous errors in non-compliant ramp installations is the failure to include a sufficiently large, level landing at the top of the ramp, directly outside the door. A ramp that runs directly up to the door threshold creates a hazardous situation where the user must simultaneously balance on a slope while trying to open the door and maneuver through the entryway. This is a primary cause of rollback accidents.
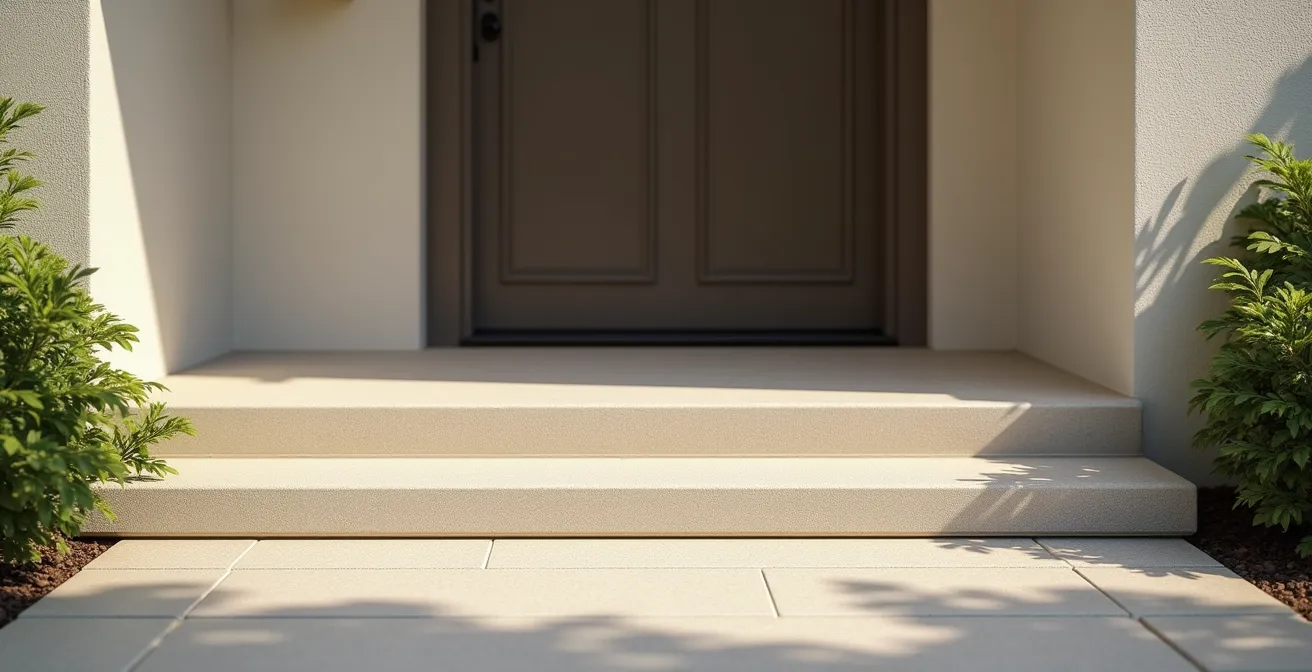
To prevent this, ADA compliance standards mandate a 5′ x 5′ minimum level landing at the top of a ramp. This is not an arbitrary dimension; it is the calculated space required for a wheelchair user to stop, turn, and safely navigate the doorway without risk. This platform provides a stable, flat surface, allowing the user to manage the door without having to fight gravity on an incline. It is a non-negotiable safety feature.
The requirement becomes even more critical when the door swings outward over the landing. The presence of the door must not obstruct the minimum required maneuvering space.
Case Study: Door Swing and Maneuvering Clearance
An analysis of ramp-related accidents found that a significant number occurred at the threshold of outward-swinging doors. When a door opens onto a landing, it temporarily reduces the usable surface area. If the landing is not large enough to accommodate the full arc of the door swing while still providing a 60-inch (5-foot) clear space for the wheelchair, the user can become trapped or be forced backward onto the slope. A compliant design ensures the landing area is sized so the door swing does not reduce the essential maneuvering clearance, preventing rollback and allowing for safe passage.
When to Rent a Modular Ramp Instead of Building One?
The decision between building a permanent ramp and renting a modular system is primarily driven by timeline, budget, and certainty. While a permanent wood or concrete ramp seems like a long-term solution, it is often not the most practical or financially sound choice, especially when the duration of need is unknown or temporary.
Renting a modular aluminum ramp is the superior option in several common scenarios. For short-term needs, such as post-surgery recovery (3-6 months), the cost of renting is significantly lower than the purchase and installation cost of a permanent ramp. Modular systems are also ideal for individuals with progressive conditions, as they can be easily modified, extended, or removed as mobility needs change. This flexibility is impossible with a permanent structure.
Furthermore, renting provides a solution for those awaiting a move or living in a rental property where permanent modifications are not allowed. Professional rental services include installation and removal, leaving no damage to the property, which can be a crucial factor in maintaining a home’s resale value. The break-even point for renting versus buying can be several years, making renting a highly cost-effective strategy for any non-permanent situation.
| Scenario | Rental Cost | Purchase Cost | Break-Even Point |
|---|---|---|---|
| Short-term recovery (3-6 months) | $150-300/month | $1,000-$10,000 | 7-33 months |
| Progressive condition (unknown timeline) | Flexible monthly | May need modifications | Rental preferred |
| Awaiting home sale/move | No installation damage | May affect resale | Rental preferred |
| Testing configurations | Easy adjustments | Costly modifications | Start with rental |
Choosing Between Manual and Power Wheelchairs for Long-Term Shoulder Health
A ramp is not a one-size-fits-all solution. The type of mobility device being used—specifically, a manual versus a power wheelchair—dictates critical design specifications that are essential for both safety and usability. Overlooking these differences can render a ramp difficult to use, dangerous, and non-compliant.
Power wheelchairs are heavier and wider than their manual counterparts. Therefore, a ramp intended for a power chair must be engineered with a higher weight capacity, typically between 600-800 lbs, and have a minimum clear width of 48 inches to provide adequate maneuvering space and prevent wheels from going over the edge. These specifications are non-negotiable for safe operation.
Manual wheelchair users, on the other hand, are directly impacted by the ramp’s slope. While the standard maximum slope is 1:12 (one inch of rise for every 12 inches of run), this can still demand significant upper body and shoulder strength. For long-term shoulder health, a gentler slope of 1:15 or 1:16 is highly recommended wherever space permits. Additionally, for long ramp runs, codes often require rest platforms. Installing a level platform at least every 30 feet of ramp is critical for a manual user, allowing them a safe place to stop and recover without risk of rollback. Handrail height, positioned between 34 and 38 inches, is also vital for providing optimal leverage during manual propulsion.
Navigating Uneven Community Environments With Limited Mobility
A compliant ramp is only as effective as its transition to the surrounding environment. An abrupt or poorly designed interface between the base of the ramp and the ground, sidewalk, or driveway can create a significant tripping hazard for pedestrians and a barrier for the wheelchair user. The ramp must connect seamlessly to the adjoining surface.
The primary concern at the base of a ramp is managing the transition to a different grade. A level landing measuring at least 36 inches in length is required at the bottom. This provides the user with adequate room to safely transition onto or off of the ramp without having to navigate a compound slope. It ensures their casters are on a level surface before they proceed.
Where a ramp run is crossed by a pedestrian path, the design must incorporate side flares. These are sloped sections on the sides of the ramp that mitigate the abrupt change in level. ADA guidelines specify a maximum slope of 1:10 for these flares to prevent them from becoming a tripping hazard. This ensures that someone walking across the ramp path will not catch their foot on a sharp edge. The goal is to create a fully integrated path of travel, where the ramp becomes a natural and safe extension of the public walkway or private driveway.
Key Takeaways
- The 1:12 slope ratio is a legal maximum for public access; a gentler slope is always safer and preferable for private residences when space allows.
- A level 5′ x 5′ landing at the doorway is the most critical safety feature, preventing rollback and allowing for safe maneuvering. It is non-negotiable.
- Modular aluminum ramps offer superior long-term value, winter safety, and flexibility compared to permanent wood structures, especially for temporary or uncertain needs.
The Renovation Mistake That Leaves Doorways Too Narrow for Wheelchairs
The most costly and frustrating error in a ramp installation project occurs when the final component—the doorway—is overlooked until the end. A standard interior door provides only about 28-30 inches of clear passage, which is often insufficient for a wheelchair. Building a perfect ramp that leads to an impassable doorway renders the entire structure useless. The doorway and its approach must be assessed and modified *before* the ramp and landing are constructed.
The required clear width for a wheelchair-accessible doorway is a minimum of 32 inches, but 36 inches is recommended for comfortable passage. This measurement must be taken from the face of the door to the opposite stop with the door open 90 degrees. Simple solutions, such as installing offset hinges, can often add 1.5 to 2 inches of clearance without requiring major structural changes. In other cases, widening the doorframe itself may be necessary. This work dictates the final height and position of the door’s threshold, which in turn determines the required height of the ramp’s top landing.
Executing the renovation in the correct sequence is paramount to avoid wasted materials and labor. Building the landing before finalizing the door modifications will almost certainly result in a mismatch in height and alignment. A proper audit and modification plan is the foundation of a successful accessibility project.
Action Plan: Correct Renovation Sequence for Doorway and Ramp
- Conduct Path of Travel Audit: Measure the existing door’s clear width at a 90-degree open angle and assess the approach angles from inside and outside.
- Assess and Modify Doorway: Determine if offset hinges are sufficient or if the doorframe must be widened to achieve a minimum 32-inch clearance. Complete all door modifications.
- Build Landing: Construct the top landing platform so that its finished surface is level and perfectly flush with the final, modified door threshold height.
- Construct Ramp: Build the ramp sections to connect the ground level to the properly positioned and height-matched landing platform.
- Verify Maneuvering Clearance: Confirm that a 60×60 inch (5’x5′) clear space remains on the landing when the door is fully open, especially if it swings out onto the platform.
To ensure full compliance and safety, the crucial first step is to evaluate your specific entryway against these regulatory requirements. This audit will form the basis of a sound installation plan that prioritizes safety above all.