In summary:
- Returning to exercise after 70 isn’t about finding one “perfect” activity, but learning to move intelligently and listen to your body’s specific signals.
- Start with ultra-low-impact options like aquatic therapy or chair yoga to build a foundation of confidence and mobility with minimal joint stress.
- Learn to differentiate between “good pain” (muscle soreness) and “bad pain” (joint or nerve issues) using a simple traffic light system to prevent injury.
- Incorporate pacing techniques and have a plan for setbacks to ensure your fitness journey is sustainable, consistent, and empowering.
The thought of starting an exercise routine after a long period of inactivity can be daunting, especially when you’re over 70. The desire to regain strength and mobility often clashes with a very real fear of injury. You hear the advice to “just start walking” or “listen to your body,” but what does that mean when your joints ache and you’ve forgotten what it feels like to move with confidence? This fear isn’t just in your head; it’s a sensible response to a body that has changed. The stiffness in your knees, the twinge in your back—these are signals that demand a more thoughtful approach than simply “pushing through it.”
Many guides offer generic lists of exercises, but they fail to address the core issue: the loss of trust in your own body. They don’t teach you how to interpret the difference between the productive ache of a muscle getting stronger and the warning sign of a joint in distress. The key to a successful and safe return to fitness isn’t about finding a magic exercise. It’s about adopting a philosophy of intelligent movement. This means learning to become your own best therapist—understanding the principles of safe motion, adapting exercises to your daily capacity, and using physical feedback as a guide, not a barrier. This approach transforms exercise from a risk to be managed into a tool for empowerment. This guide will walk you through not just what to do, but how to think about movement, so you can build a sustainable practice that serves you for years to come.
This article provides a structured roadmap to help you navigate this journey. We will explore the safest and most effective low-impact methods, from the supportive environment of water to the stability of a chair, and equip you with the knowledge to make informed decisions about your own health and well-being.
Summary: A Practical Guide to Resuming Exercise Safely After 70
- Why Aquatic Therapy Relieves Osteoarthritis Pain Faster Than Walking?
- How to Do Chair Yoga Safely at Home Without an Instructor?
- Recumbent Bikes vs. Ellipticals: Which Is Safer for Bad Knees?
- The Mistake of Pushing Through “Bad Pain” vs. “Muscle Soreness”
- How to Adapt Cardio Exercises for Wheelchair Users Effectively?
- How to Adjust Health Plans When Mobility Declines Unexpectedly?
- How to Use the “Pacing” Technique to Walk Further With Less Pain?
- How to Integrate Cognitive Tasks Into Physical Therapy?
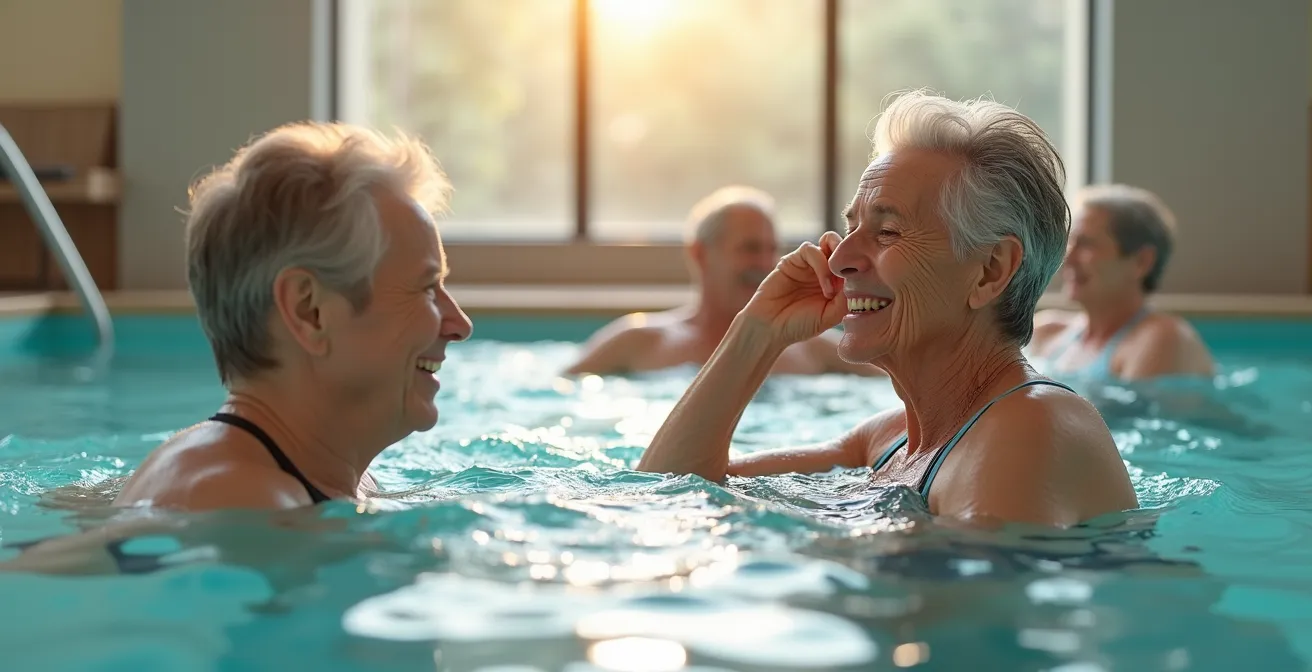
Why Aquatic Therapy Relieves Osteoarthritis Pain Faster Than Walking?
For anyone with significant joint pain, especially from osteoarthritis, the idea of walking for exercise can seem like a cruel joke. The very movement meant to help is a source of pain. This is where aquatic therapy emerges as a powerful starting point. The magic of water lies in a simple principle: buoyancy. When you’re submerged in water up to your chest, your body bears only about 25-35% of its actual weight. This dramatically reduces the compressive forces on your knees, hips, and spine, allowing you to move with a freedom you may not have felt in years. The hydrostatic pressure of the water also acts like a gentle, full-body compression sleeve, which can help reduce swelling and improve circulation.
The benefits are not just theoretical. In fact, a 2024 randomized controlled trial demonstrated that aquatic therapy can lead to a 50% reduction in pain for individuals with osteoarthritis, compared to just 17% for land-based exercises. The warm water often used in therapy pools further aids in relaxing tight muscles and soothing sore joints, making movement more comfortable. This supportive environment allows you to build strength and improve your range of motion without the painful impact of land-based activities. As a case in point, seniors with knee osteoarthritis who participated in a six-week underwater treadmill program reported not only reduced joint pain but also significant improvements in their overall mobility, balance, and daily function. It’s a perfect first step for reintroducing your body to movement in the safest, most supportive setting possible.
How to Do Chair Yoga Safely at Home Without an Instructor?
Once you’ve built some initial confidence, perhaps in the water, bringing movement into your own home is the next step. Chair yoga is an excellent option because it provides the benefits of traditional yoga—improved flexibility, balance, and mindfulness—with the added security of a stable base. However, exercising alone requires a “safety-first” protocol. The goal is to create a controlled environment where you can move freely without risk. This starts before you even begin the first stretch. Think of it as a pilot’s pre-flight checklist: a systematic review to ensure everything is in order for a safe journey.
This preparation is the cornerstone of intelligent movement at home. As Keeley Frampton et al. noted in the Journal of Applied Gerontology, a key element for safety in senior exercise programs is a culture where “participants were encouraged to do what they could but not to over-exert themselves.” This principle is even more critical when you are your own instructor. Before you begin, take a moment to run through a mental checklist.
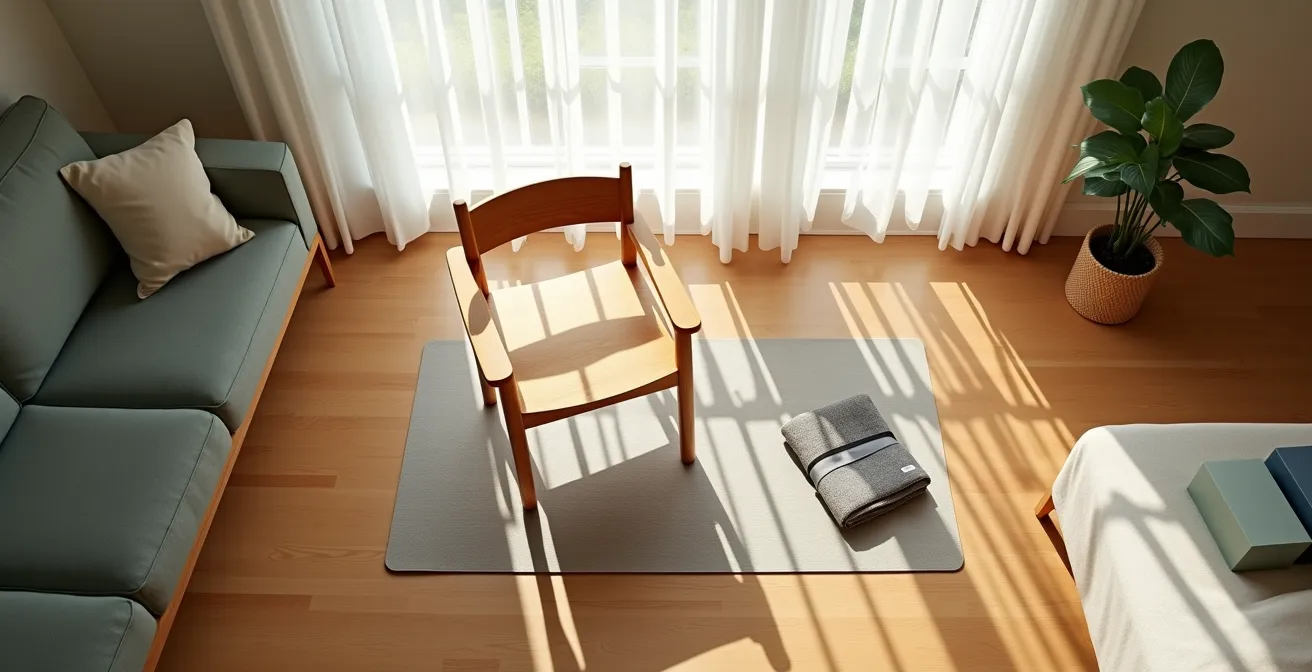
As the image above illustrates, a safe space is an organized space. Your pre-session setup should include:
- Chair Selection: Use a sturdy, armless chair without wheels. A straight-backed dining chair is often perfect.
- Surface and Placement: Place the chair on a flat, non-slip surface. For extra stability, position it with its back against a wall.
- Clear Your Space: Ensure you have at least an arm’s length of clear space around you in all directions to avoid bumping into furniture.
- Comfortable Clothing: Wear clothes that allow you to move freely but aren’t so loose that they could get caught on the chair.
- Props Within Reach: Have a towel for padding and a belt or strap for assisted stretching nearby so you don’t have to get up mid-session.
This deliberate setup minimizes risks and allows you to focus completely on your movements, building both physical and mental well-being.
Recumbent Bikes vs. Ellipticals: Which Is Safer for Bad Knees?
When you’re ready to add some dedicated cardiovascular exercise to your routine, low-impact machines like recumbent bikes and ellipticals are excellent choices. But for someone with knee concerns, they are not created equal. A recumbent bike is often the safer starting point. Its design features a larger seat and back support, which takes the pressure off your lower back and hips. More importantly, the seated position ensures that your knees are never bearing your full body weight during the exercise. The motion is a controlled, circular pattern that is very gentle on the knee joint.
An elliptical machine, while also low-impact, requires you to be in a standing position. Although the gliding motion is smoother than walking or running, your knees are still supporting your body weight. This can be problematic if you have significant pain, instability, or muscle weakness around the joint. The best approach is not to guess, but to test. Most gyms or community centers will allow you to try the equipment. Your body is the ultimate expert, and giving it a “test drive” is the most effective way to determine what’s right for you. This is a core tenet of intelligent movement: gathering data directly from your own physical experience.
Your 5-Minute Equipment Test Drive Protocol
Before committing to a machine, run through this simple 5-minute assessment:
- Test range of motion: Can you complete the full movement cycle without any pain or restriction in your knee?
- Check for pinching: Be alert for any sharp, pinching sensations within the joint. This is a red flag.
- Assess stability: Do you feel stable and balanced, or are you straining other muscles (like your back or hips) to compensate?
- Monitor pain signals: Immediately stop if you feel any sharp, radiating, or grinding pain. This is different from muscle fatigue.
- Evaluate comfort after 5 minutes: Your joints should feel warm and lubricated, not painful or inflamed.
This quick diagnostic protocol empowers you to make a choice based on your body’s real-time feedback, ensuring you select the tool that will help, not harm, your knees.
The Mistake of Pushing Through “Bad Pain” vs. “Muscle Soreness”
Perhaps the single greatest barrier to starting and sticking with an exercise program is the fear of pain. The advice to “listen to your body” is useless if you don’t understand its language. The most critical skill you can develop is the ability to differentiate between “good pain” and “bad pain.” Good pain, more accurately called Delayed Onset Muscle Soreness (DOMS), is the mild, diffuse ache you feel in your muscles 24 to 48 hours after a new activity. It’s a sign that your muscles have been challenged and are now repairing themselves to become stronger. It feels like a satisfying fatigue, and the muscles are often tender to the touch.
Bad pain, on the other hand, is a warning signal that should never be ignored. It’s often sharp, electric, or grinding. It tends to be localized in a specific joint or area and may persist or even start *during* the activity. Pushing through this kind of pain is how injuries happen. To help you become fluent in your body’s language, you can use a simple “Traffic Light” system. This mental model provides a clear framework for making decisions in the moment, removing the guesswork and fear. It transforms you from a passive participant into an active, informed manager of your own physical well-being. This is intelligent movement in action.
Your Action Plan: The Traffic Light Pain Assessment System
- GREEN LIGHT – Good Pain: A diffuse muscle burn or fatigue that feels satisfying. It might peak 24-48 hours after your workout and feels tender to the touch, but often improves with gentle movement like a slow walk. This is a sign of progress. Action: Continue with your plan.
- YELLOW LIGHT – Warning Pain: A localized, sharp twinge that appears during a specific movement but stops when you stop. This is a caution sign. Action: Stop the movement, check your form, reduce your range of motion, and try again gently. If it persists, switch to a different exercise.
- RED LIGHT – Stop Pain: Sharp, electric, radiating, or grinding pain that continues even after you’ve stopped moving. Pain that is located deep within a joint is also a red light. Action: Stop all activity immediately. Do not push through. Apply rest and consider a medical assessment if it doesn’t resolve.
How to Adapt Cardio Exercises for Wheelchair Users Effectively?
A decline in mobility or the use of a wheelchair does not mean the end of effective cardiovascular exercise. The heart is a muscle, and it doesn’t care if you’re standing, sitting, or lying down; it only cares about being challenged. The key is to shift the focus from the lower body to the upper body and core, using dynamic, rhythmic movements to elevate your heart rate. The outdated idea of being limited to a monotonous arm bike is gone. A vast range of seated exercises and adapted workouts now exists, designed specifically to build cardiovascular endurance from a seated position.
The goal is to engage large muscle groups in the back, chest, and arms in a sustained way. This can be achieved with creativity and some simple equipment. Think beyond simple pushing and pulling. Incorporating movements in multiple planes of motion, varying your speed, and adding light resistance can create a workout that is both challenging and engaging. For example, seated cardio-boxing not only raises your heart rate but also improves coordination and core stability. It’s about finding activities you enjoy, because consistency is the true secret to cardiovascular health.
Here are some effective and dynamic cardio options that go beyond the basics:
- Seated Cardio-Boxing: Perform jabs, crosses, and hooks, with or without 1-2 lb hand weights, in 30-second high-intensity intervals followed by 30 seconds of rest.
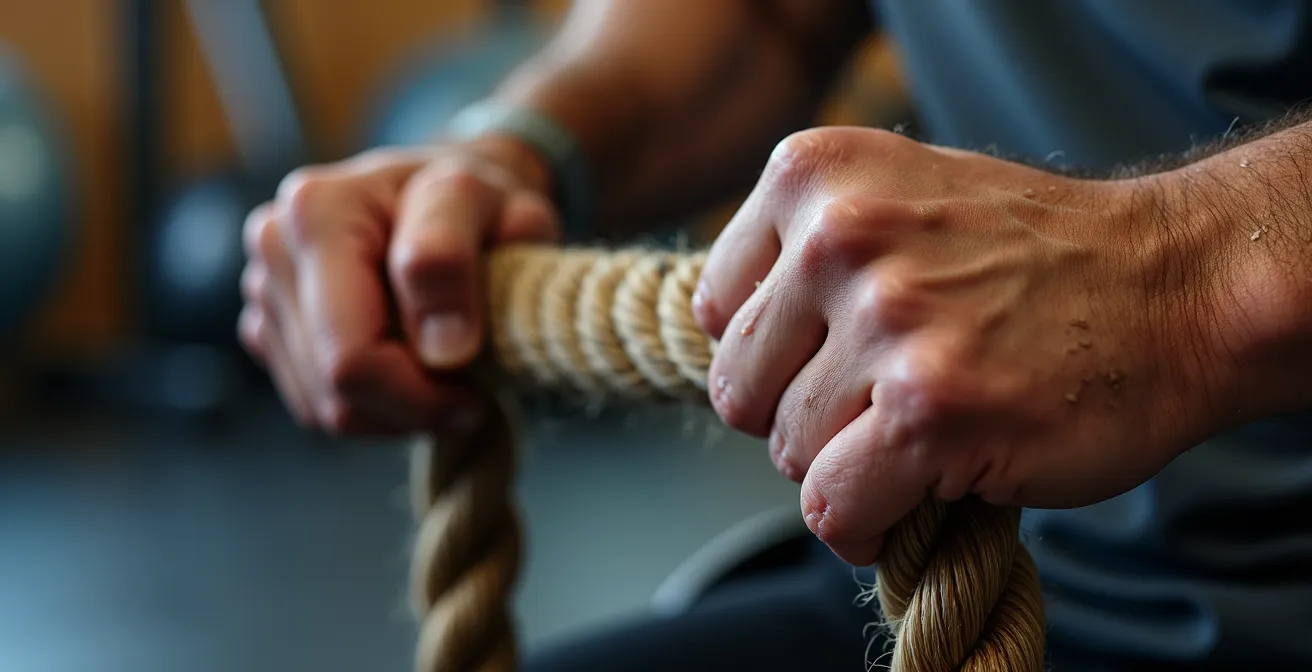
- Seated Battle Ropes: Use lighter, shorter ropes (e.g., 15-20 feet) to create waves, slams, and alternating patterns. This is a fantastic full-upper-body workout.
- Resistance Band Cardio: Anchor a resistance band to a door and perform quick, repetitive pulls (like a seated row) and pushes (like a seated chest press).
- Wheelchair Dancing: Put on your favorite music and simply move! Focus on large, expressive arm movements to keep your heart rate up. This is as much about joy as it is about fitness.
How to Adjust Health Plans When Mobility Declines Unexpectedly?
Even with the most careful planning, setbacks happen. A flare-up of arthritis, a minor strain, or simply a day where you feel more fatigued than usual is a normal part of any fitness journey, especially when you’re starting out. The biggest mistake is to view this as a failure and stop completely. This “all or nothing” thinking can derail weeks of progress. The intelligent movement approach is to adopt a “Horizontal Pivot” strategy. Instead of stopping, you pivot to a different activity that doesn’t stress the affected area.
Think of your body as a team of players. If your knee (a key player) needs to sit on the bench for a few days, you don’t forfeit the game. You simply give the other players—your arms, your core, your cardiovascular system—more playing time. This strategy allows you to maintain the habit and frequency of exercise, which is crucial for long-term success, while giving the inflamed area the time it needs to recover. This approach builds resilience, both physical and mental. As the medical review team at Healthline confirms, the goal is to “allow older adults to stay physically active without stressing their joints.” The Horizontal Pivot is the practical application of this wisdom.
The Horizontal Pivot Strategy for Mobility Setbacks:
- Identify the affected area: Is it your right knee, your lower back, or your left shoulder that’s signaling “red light”? Be specific.
- Find an alternative movement: If walking hurts your knees, pivot to seated cardio-boxing or aquatic therapy. If your shoulder hurts, pivot to a recumbent bike or a gentle walk.
- Maintain movement frequency: If you were exercising three times a week, continue exercising three times a week. Only the activity type changes, not the schedule.
- Focus on unaffected areas: Use this time as an opportunity to strengthen other muscle groups.
- Plan your gradual return: Once the affected area is back in the “green,” reintroduce the original activity slowly, perhaps at 25% of your previous intensity or duration, and build back up.
How to Use the “Pacing” Technique to Walk Further With Less Pain?
Walking is a fantastic and accessible exercise, but for many, the limiting factor isn’t time; it’s pain or endurance. You start a walk feeling good, but after ten minutes, your back starts to ache or your knees begin to protest. The common response is to push through until the pain forces you to stop. The “pacing” technique offers a smarter, more sustainable alternative. Pacing involves breaking up your activity into smaller, manageable chunks interspersed with brief periods of rest or gentle stretching. Instead of walking for 20 minutes straight, you might walk for 4 minutes and stretch for 1 minute, repeating the cycle four times.
This approach has profound benefits. Firstly, it prevents pain and fatigue from accumulating to a breaking point. You address discomfort *before* it becomes overwhelming, which often allows you to go further in total. Secondly, it transforms the mental dynamic of the exercise. Instead of focusing on a distant, daunting finish line, your only goal is the next 4-minute interval. This makes the activity feel less intimidating and more achievable. You can use a simple watch timer, or make it more engaging by using an “Environmental Landmark” strategy, as some fitness instructors suggest: walk to the next lamppost, rest, then walk to the big oak tree, and so on. This turns a workout into a more mindful and enjoyable exploration of your surroundings.
A Simple Walk-Stretch Interval Protocol to Try:
- Walk Phase (4 minutes): Move at a comfortable, conversational pace. You should be able to talk without getting breathless.
- Stretch Phase (1 minute): Stop and perform a gentle standing stretch. A calf stretch against a wall or a hamstring stretch using a bench are great options.
- Breathe and Reset: During your stretch phase, take 3 deep, slow breaths. This helps to reset your nervous system and lower your heart rate slightly before you begin again.
- Repeat: Continue this 4:1 cycle for your desired total workout time (e.g., 4 cycles for a 20-minute workout).
- Track Progress: You may be surprised to find that your total distance covered using this method is greater than what you could achieve with continuous walking.
Key takeaways
- The safest exercises (aquatic therapy, chair yoga) minimize joint impact while building confidence and foundational strength.
- Learning to distinguish between muscle soreness (a sign of progress) and joint pain (a warning sign) is the most critical skill for preventing injury.
- Consistency is more important than intensity. Using strategies like the “Horizontal Pivot” for setbacks and “Pacing” for endurance ensures you can keep moving.
How to Integrate Cognitive Tasks Into Physical Therapy?
The journey back to fitness is not just about rebuilding the body; it’s also about sharpening the mind. A growing body of research shows a powerful link between physical activity and cognitive function. As a study in the International Journal of Yoga found, activities like Hatha yoga led to improvements not just in physical measures but also in quality-of-life indicators related to well-being, energy, and fatigue. You can amplify these benefits by intentionally integrating cognitive tasks into your physical therapy, a practice known as dual-tasking. Dual-tasking involves performing a simple mental exercise while you move. This challenges your brain to manage two things at once, which can improve balance, focus, and cognitive resilience.
The beauty of dual-tasking is its simplicity. It doesn’t require any special equipment, just a little bit of creativity. The goal is to choose a cognitive task that is slightly challenging but not so difficult that it compromises the safety of your physical movement. Start with simple tasks and gradually increase the complexity as you get more comfortable. This practice not only makes your exercise session more engaging but also directly trains the neural pathways that support balance and prevent falls, as it mimics real-life situations where you’re often walking while talking, thinking, or observing your surroundings.
Simple Dual-Tasking Ideas to Try:
- Count Backwards: While walking or using a recumbent bike, try counting backwards from 100 by threes (100, 97, 94…).
- Name Categories: As you perform chair yoga poses, try to name as many animals, fruits, or cities starting with the letter ‘A’ as you can. Move to ‘B’ for the next pose.
- Recite a Poem or Song Lyrics: Engage your memory by reciting something familiar while doing gentle leg lifts.
- The Alphabet Game: During a walk, look for objects that start with each letter of the alphabet in order (A for ‘Asphalt’, B for ‘Bush’, C for ‘Car’).
By weaving these simple brain games into your physical routine, you’re doing more than just exercising your body; you’re building a more robust and integrated mind-body system.
You now possess the foundational principles of intelligent movement. You understand how to choose the right environment, how to listen to your body’s signals, and how to adapt when faced with challenges. The journey of a thousand miles begins with a single, safe step. Your first step is not to run a marathon, but to choose one idea from this guide—perhaps a simple chair stretch or a short, paced walk—and try it today.